Introduction
u/DerzoDev’s up to date materials’ spreadsheet
If a material isn’t 2 sided but you really need it, you can always duplicate the mesh, flip the normals and have it at the same transform as the other one, just without collision.
If the texture is too big, small or stretched, go back to the third last blender tip from Use meshes rather than CSG (it’s explained here why. Try to use opaque materials as much as possible, seeing multiple translucent materials overlapping often creates weird artifacts. In the mesh properties there however is a property called Translucency Sort Priority. The highest value will render on top.
To get some of the materials working in-game you need to have the engine packages in your CookedPCConsole folder, so just download these Workshop textures, it includes everything you need. That will also make the skybox work. Be careful, this textures won’t be included in your map package so people will need to install it too. It always better to use your own textures for the end user.
Overview
There’s a video made by u/Wejrox explaining this on youtube.
Currently, we have access to a limited number of default engine materials, found in the default package files shipped with UDK. The reason we can use these is because Rocket League was cooked with these files on the system. By referencing these files in our custom maps, the game knows where to find them in the game files which is why they work. Any custom materials cannot compile, as they have not been cooked into the game files and are only referenced by our uncooked maps. This means one thing: we have to modify the existing materials!
Limitations
You should be aware that this is not the same as being able to create your own materials, it is replacing certain parts of existing materials to get the textures that we want to use into the game. We are limited in the fact that we can only modify what is available in the engine files. If the material that we want to modify does not allow transparency, then there is no way for us to enable transparency. If the engine material cannot be used on skeletal meshes, then we cannot use that material on a skeletal mesh etc.
Creating Your First Custom Material
In the Content Browser, browse to a package called EngineDebugMaterials. We need to find a material inside this package called TexturePaint_2Tex_Color.
Right click, and Create New Material Instance (Constant). A window will pop up where you will have to enter the name of your package file, and a name for your material. Do not leave the package name as EngineDebugMaterials as this will overwrite the engine version.
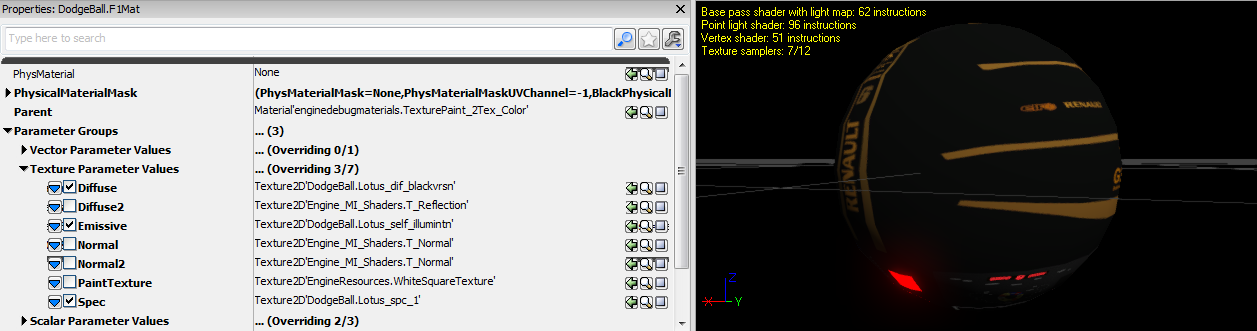
On the window that opens, open up Parameter Groups > Texture Parameter Values. Here you will find all of the available options for this type of material. You can add textures to each of these slots from the Content Browser by selecting a texture from your package in the Content Browser, and clicking the green arrow to the right hand side of the texture slot.
Next to the blue arrow on the left side, make sure you tick the box for the textures that you apply.
Once you have made all of the changes that you need to make, close the Material Instance Editor window.
In the Content Browser, find your package which has the material in it. Select the material.
With the material selected, you can either:
- drag and drop this material on the static mesh in the viewport.
- double click your static mesh in the content browser (or the viewport), and apply the material directly to the static mesh.
- right click on an object in the viewport > Materials > Apply from Content Browser.