REQUIRED
Be sure to have Dummy Assets installed. You will also need an image editor software such as Gimp or Photoshop, because we will work with .TGA files.
A SMALL EXPLANATION OF THE GRASS LAYERS
First, you need to know that all materials that are about the grass are centered at 0,0,0. Which means that even if you move a mesh, its texture will still be centered at 0,0,0. Weird.
Grass works with 3 layers (mask, grass and base), and we will explain them from top to bottom.
MASK
It’s a simple level of grey texture, from black (100%) to white (0%). No alpha channel.
The black parts on this texture “cut” the grass, and “dig” the base. White do nothing.
I say “dig” because with the park_p assets (the one we’ll use in this tutorial), it replace the base texture with a dirt texture where the mask is black.
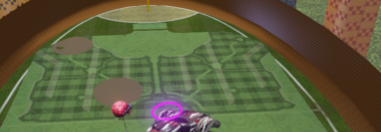
The cool thing is that we can have 2 differents mask textures. One for the grass, and one for the base. But we will use only one here to keep it simple.
This mask is applied to the whole base. Even for the grass, it’s applied to the basesize. I think the materials are tied.
To confirm:
With other assets, it may show something else than dirt (maybe pavements or metal depending on the map)
GRASS
It’s a mesh that has a material applied. It’s a # shape. I mean… planes that cross each others.
The material will have a texture and a mask. The texture will have an alpha layer that will draw the field white lines on the grass..
To confirm:
The height of the cutted grass depends of the grey level of the mask
BASE
It’s a Plane mesh that has a material applied.
The material will have a texture and a mask. The texture will have an alpha layer that will draw the field white lines on the base.
To confirm:
The density of the dirt that is replacing the base texture depends of the grey level of the mask
A LAST EXPLANATION
Rocket League grass uses actually 2 different textures for grass and base. The grass one represents the whole field and the base one only a quarter of it. I didn’t managed to find how the game actually mirrors and place them, but I managed to make it work, with a very simple trick: work by thinking that blue and orange side are two separate pieces. Especially for the grass.
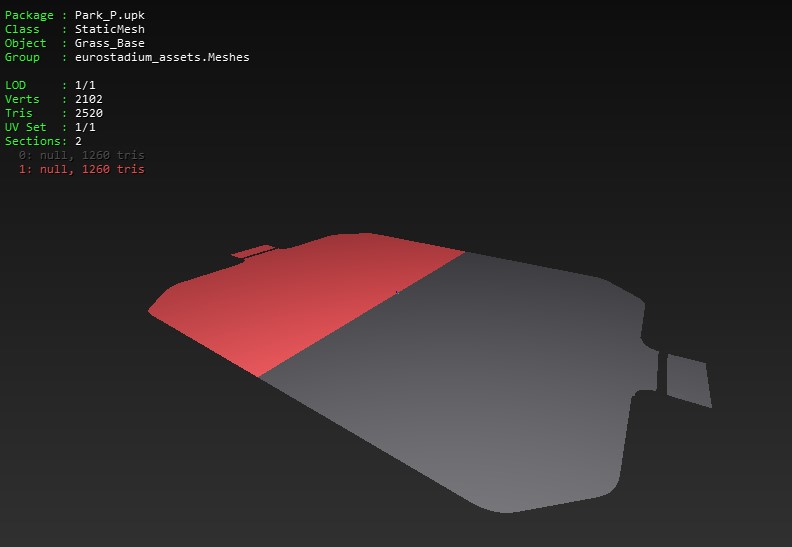
The base mesh needs to have two materials (see picture below).
This default mesh is eurostadium_assets.Meshes.Grass_Base in the Dummy Assets.
I’ve tested the grass with the mesh eurostadium_assets.Meshes.modular.Grass_1x1, but the eurostadium_assets.Meshes.modular.Grass_Side might be better and cover a bigger surface. Remeber that you can group meshes with Ctrl + G, and copy/paste then group the whole thing again. Always thinking that at the end you still need TWO grass groups. One for the blue side, one for the orange side.
PREPARE YOUR TEXTURES
First of all, you will need to right-click -> Export to file these files from the Park_P package that is comming with the Dummy Assets:
- FieldSkin_FutureGrid_1x1_D
- Park_GrassMask_M
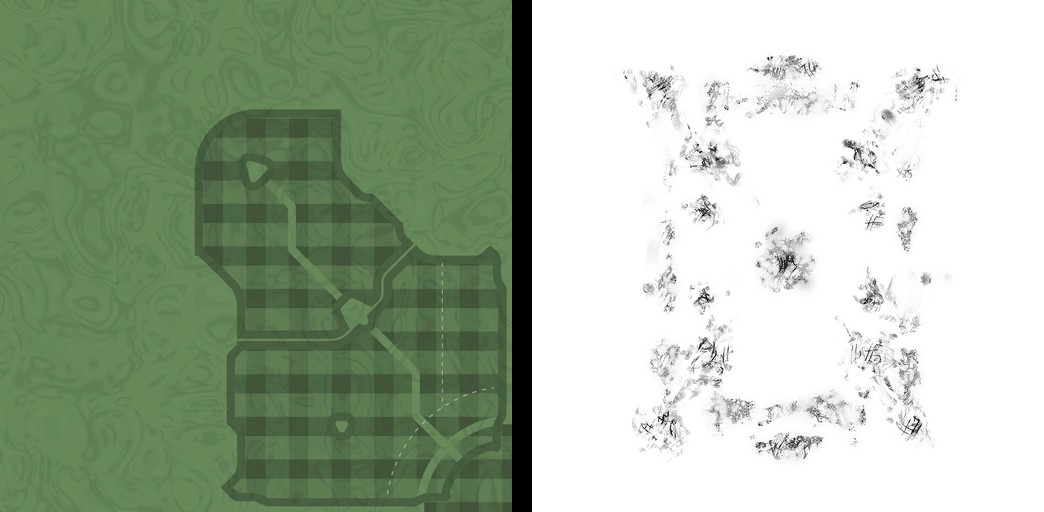
If you want to use default game assets, you can just refer to these two textures when we will create the materials.
In the folder where you just exctracted the textures, copy 3 times FieldSkin_FutureGrid_1x1_D. Now you have 4 of it.
Rename them to have 4 files named like that:
- Field_Base_Team_0
- Field_Base_Team_1
- Field_Grass_Team_0
- Field_Grass_Team_1
And of course, keep the file extension as .tga.
You can name them how you want, but it will be easier if we all use the same pattern names.
Now you can edit your 5 files.
The textures ending with 0 are for blue side. The mask will be applied on the whole field, not only a side. remember ?
I will use these textures:

I will keep the Team_1 files unchanged.
When done, import your 5 textures in your package, no particular options. When they are in you package, you will need to double-click each of the 4 grass and base textures to edit them. All the textures ending by Team_0 should have the parameter Adress X setted as mirror and Adress Y setted as wrap. Team_1 should have both X and Y as mirror.
You could just rotate the textures in your image editor instead of Setting the Team_1 Y mirror, but I find it easier to keep them all in the same orientation.
To have a Rocket League perfect feel, both Base and Grass textures could use the same texture. But i’ll show here how you can have different textures on them. Who know, you could have mud on your base texture and don’t want it repeated on your grass texture.
PICTURES TO UNDERSTAND
The mask is applied to the whole field, it’s not mirrored or repeted or clamped or whatever. It’s streched to the whole base mesh.

The weird thing is that even by moving the grass meshes or base meshes, the materials will always be centered to 0,0,0
As you can see below, baseand grassare applied only to a half of a field and they are mirrored (because remember they are 1/4 of the whole field texture). But the mask is applied to the whole field. Don’t ask me why. Ask Psyonix.
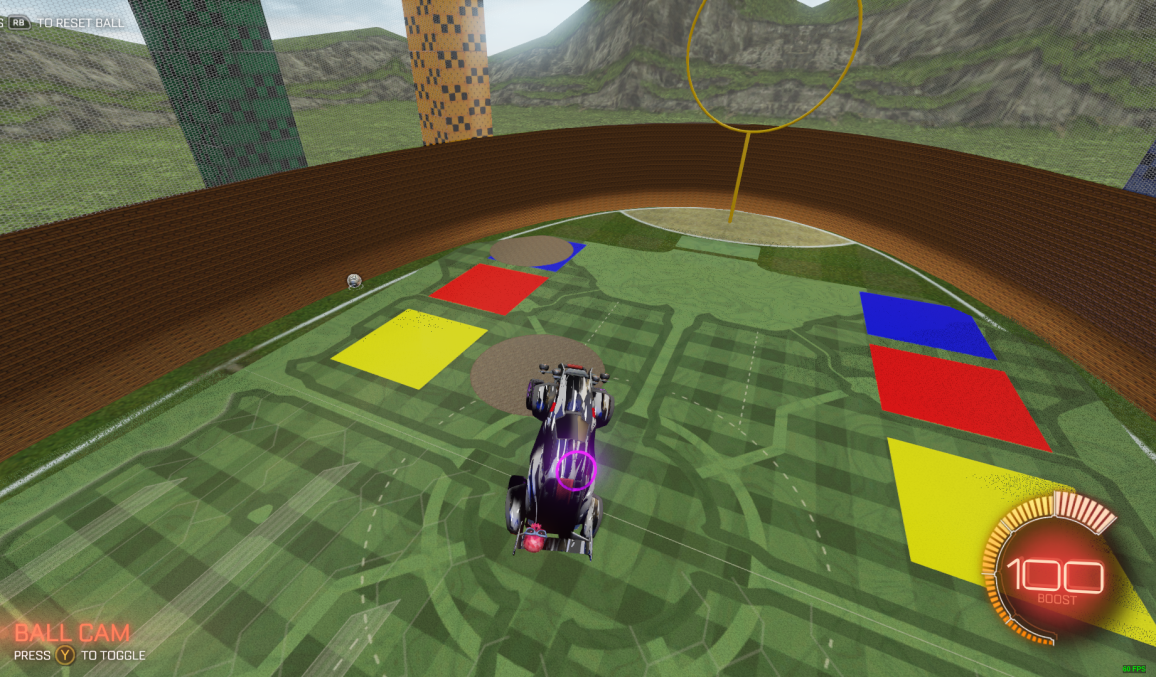
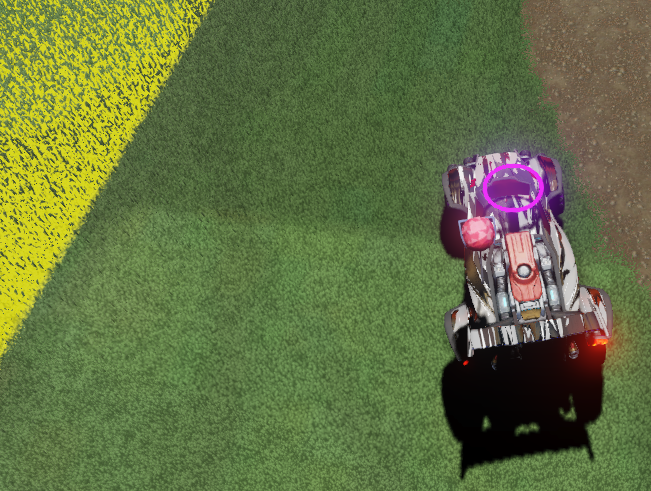
Closer view, you can see how the mask cut the grass and dig the base (it adds dirt on your base texture). I had a Yellow square on my base texture, and you can see a few yellow pixels under the grass on the left side of the picture.
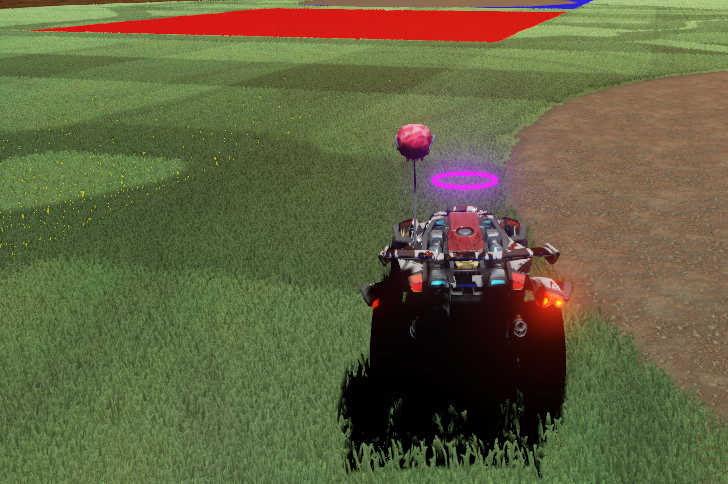
If you tilt the camera, the grass let you see the base under itself, now you can see the yellow square. Imagine this yellow square as mud. In real life, the dirt ( base ) is muddy. Not the grass on top of it.
CREATE THE MATERIALS
This is the hard part, you can get a bit lost in the different packages. Use the search bar at the top of the Content Browser. It’s the best way to go through the comming repetitive pain.
BASE MATERIALS
Create an Instance of park_assets.Materials.Grass_Base_Team1_MIC in your package. I will name it Field_Base_Team_0_M (with M for material).
Edit this material instance and set the Diffuse parameter to your Field_Base_Team_0 and the GrassMask parameter to your mask texture. You should change the editor Color to be blue, it will be easier on the viewport to recognize it. Don’t forget to check the boxes to override the defaults game settings.
Now, create a copy in this instance just next to the previous one, repeat the part above by changing it all with Team_1 and setting the color to orange. It will be easier to recognize it on the viewport.
The default mesh eurostadium_assets.Meshes.Grass_Base has two materials slots. You can set them now. Slot 0 (the first one) for Team_0 … I think you know what to set in the slot 1.
The easier way is to select the material in the Content Browser and in the viewport on your base mesh right-click -> Materials -> Assign form Content Browser -> Slot X. When you set the first one, you will see by yourself that only the half of the mesh has a material.
GRASS MATERIALS
Create an Instance of park_assets.Materials.GroomedGrass_FakeLight_Team1_MIC in your package. I will name it Field_Grass_Team_0_M (with M for material).
Repeat the whole base materials process, using the good textures of course.
You should use in-game grass meshes assets. They are in the eurostadium_assets.Meshes.modular package group. I talked about them in the “A LAST EXPLANATION” part above. I couldn’t manage to reproduce perfeclty the game grass meshes, but maybe someone good with Blender could make us a tutorial about how to cut and shape this kind of mesh.
You can now apply your two new materials to your grass meshes, one for each team.
Remember, if you’re using the 1x1 grass mesh, it’s easier to group them with CTRL+G and it’s faster to copy/paste/group and repeat that. But remember also, UDK doesn’t like to have a lot of meshes.
WHAT’S LEFT ABOUT THE GRASS ?
- Find how to make it move slowly like in-game. The grass si static at this point.
- Find how Rocket league exactly rotate and apply the mirror to the textures on the meshes to don’t have to use and edit 5 of them where the game only uses 3.